1/30/2013

Candy Cone with Decorative Corner Die

Hi! Happy Wednesday!

I’ve had a busy week (again). I’m sorry I haven’t been around much, there isn’t enough hours in the day right now. But I’m hoping to get back to normal hours within a few days. Keep your fingers crossed for things to run smooth for once! :) :) :)

This week’s project for Heartfelt Creations is a candy cone. I thought the Corner Die, that makes a beautiful semi circle if used twice on a stripe of paper, would make a great cone. And it did! Love the intricate pattern that stands out beautifully against the blue patterned paper.

strut 2

I also did a small card to go with the candy cone.

strut 1

HC products Used: HCDP1 229 Countryside Evening Paper Collection, HCD 729 Decorative Blossom Corner Die, HCPC 3502 Mini Vintage Floret PreCut Set, HCPC 3500 Open Vintage Floret PreCut Set, HCD 727 Vintage Floret Die, HCD 728 Timeless Amour Die.

If you want to see what else you can do with this amazing corner die – hop over to the Heartfelt Creations blog which is chock full of gorgeous projects by the Design Team!

Thanks for stopping by!

Tesa

1/28/2013

Skipping Stones Thank You Blog Hop

Hi!!! Today we are having a blog hop to say a huge Thank You to Heather, the owner of Skipping Stones Design. She is taking a hiatus from designing stamps and scaling down her business. As a good bye and thank you for the all she has done past and present Design Team members are having this blog hop. Play along and leave comments along the way and some super fun Skipping Stones Design stamps could be yours!
If you follow the hop, you should have arrived here from Cyndi Bundy’s blog The Scrappy Chick. If not you can start from the beginning over at Skipping Stones Design Blog.
Now over to my card. I used two of my favorite SSD sets: Funny Coffee vol. 1 and Grunge.
FInstant Human
To continue, hop over to Vanessa Menhorn’s blog Wings of a Butterfly. She will have something gorgeous in store for you!
Thanks for playing with us and make this hop special for Heather!!!
Tesa

1/23/2013

Favorite things layout and a card

Hi!
Midweek already!Time flies! I'm here to share this week's Heartfelt Creations projects. First up is a card using a background stamp and sentiment from the newest collection Countryside Evening, teamed up with some beautiful flowers from previous releases.


I am the way

I adore this burlap stamp for the background!

I am the way 2
HC products: HCDP1 229 Countryside Evening Paper Collection, HCPC 3515 Burlap Background PreCut Set, HCPC 3513 Weathered Fence Post PreCut Set, HCPC 3468 Tattered Blossoms PreCut Set, HCPC 3303 Posy Patch Flowers PreCut Set, HCD 701 Posy Patch Die. Other: Bazzill basic cardstock. Ink: Versa fine onyx black and Weathered wood distress ink. Clear embossing powder and pearls.

And - I made a layout! Yay for me! It is sooo much fun!

It's just a random page of objects I really appreciate right now.


Fem stora... HC products: HCDP1 229 Countryside Evening Paper Collection, HCPC 3468 Tattered Blossoms PreCut Set, HCPC 3303 Posy Patch Flowers PreCut Set, HCD 701 Posy Patch Die. Other: Lace, flower centers and letter stickers from Basic Grey.

Thank you for stopping by my place today. Don’t forget to visit the Heartfelt Creations Blog and check out all the gorgeousness made by the Design Team.

Have a fab day!
Tesa

1/21/2013

Masculine Valentines Card

Hi!
Happy, happy Monday!

Hope you all had a great weekend! I did, we went to visit my parents and it was soooo good to see them. ♥♥♥

Today's card is a masculine Valentines Day Card with no Valentines products what so ever. :) Instead I went with a loving sentiment and used the fabulous Wood Grain background stamp from The Rubber Cafe.


I used the clear emboss technique and I really like the result. 

The canvas tag is from Maya Road and the flower is from Petaloo.

Would you like to work with awesome red rubber like this Wood Grain stamp? Now is your chance! The Rubber Cafe is having a DT call out!  All info can be found HERE!


Thanks for stopping by!
Tesa

1/16/2013

Heartfelt Wednesday

Hi! I have two cards made with the latest release from Heartfelt Creations to share. First up is a Criss Cross Card with the lovely Melodious Songbird and the Decorative Blossom Corner Die.You are the song...

You are the song 2

HC products used: HCDP1 229 Countryside Evening Paper Collection, HCPC 3511 Melodious Songbird PreCut Set, HCPC 3510 Petite Floral Swirls PreCut Set, HCD 729 Decorative Blossom Corner Die, HCPC 3303 Posy Patch Flowers PreCut Set, HCD 701 Posy Patch Die, HCPC 3494 Delicate Asters PreCut Set, HCD 726 Delicate Asters Die. Other Products: Black Cardstock and water color paper. Versa Fine Pigment ink – Onyx Black. Distress markers: Broken China, Chipped Saphire, Vintage Photo, Weathered Wood. Clear Embossing powder. Ribbon, floss and lace. Pearls. Hanger. Glue and foam tape.

The second card is a CAS card in the size of 7x5. It’s a new format for me but I thought I’d use it with this particular stamp to give it the space it deserves. :) I love this stamp. So rustic and totally gorgeous. It’s stamped on water color paper and colored with Distress markers.

Light of my life 1

The lamp is layered on foam tape for some dimension, and the flame got some icicle stickles and the whole glass part is covered with glossy accent for a glass effect.

Light of my life 2

HC products Used: HCPC 3512 Antique Lantern PreCut Set, HCPC 3303 Posy Patch Flowers PreCut Set
HCD 701 Posy Patch Die, HCD 713 Decorative Lace Border Die. Other Products: Black and Kraft Cardstock. Water color paper. Pigment ink: Versa Fine – Onyx Black. Distress markers: Vintage Photo, Tea Dye, Peeled Paint, Shabby Shutters, Weatehred Wood, Black Soot, Cotton Candy, Mustard Seed and Wild Honey. Icicle Stickles, glossy accent and pearls. Glue and foam tape.

Thank you for stopping by my place today. Don’t forget to visit the Heartfelt Creations Blog and check out all the gorgeousness made by the Design Team.

Have a fab day!

Tesa

1/14/2013

Joy is a flower

Hi! Happy Monday!

Here is my card I did for this week’s post over at The Rubber Cafe. I can’t get enough of the Pictures Framed set. I used it with a masked piece of the large rose from the Rose Garden set.

Joy 1

I painted the rose part of the stamp with Scrap Happy Glue and covered it all up with You’re so fine glitter so it really sparkles.

Joy 3

All the papers are from MME. Love the colors! :) Sentiment is from the Friends set.

I used a sketch from Molly’s Scrapbooking’s crop. But to late to enter it. But it was a great sketch!

Joy 2

Thank you for stopping by!!!!

Tesa

1/13/2013

Thanks and a BOM layout

Hi! Happy Sunday!

I have both a card and a layout to share today. First is a thank you card, I always need a bunch of these.

Thanks

It started as a lift but somewhere on the way, I strayed and the only thing left are the rounded corner… Oh well. Sometimes it’s fun to just keep adding things…

And since I did, and have 1 flower, 6 rhinestones, 2 metal charms, 1 button, 1 pin and 1 angel I can enter this in Use 10 Embellishments Challenge in the Moxie Fab World.

My layout is about a life changing moment in life. I’ve been thinking about a hasty decision I made 17 years ago that is the starting point for the life I live today. I’m so happy I was so frustrated and irritated about my job, my boss and co workers that instead of deciding to stay and study in the town where I had family, friends and an apartment, I accepted a spot at a university in a town I’d never visited three hours away. Just like that. Thank God!

Flytten

So love these Studio Calico papers!

Thanks for stopping by!

Tesa

1/09/2013

Thanks – Countryside Evening Collection

Hi folks! I’m so happy to share the newest  Heartfelt Creations collection ‘Countryside Evening’, debuting TODAY. There’s beautiful typography, countryside scenes, one awesome die, and 24 beautiful papers.This set is a beautiful choice for the beautiful moments. Leave a comment on the HC blog by January 15th and you will be eligible to win the entire release valued at $150.92 .

I so love this new collection. The  colors are in blues and greens, soooo beautiful and the stamps – WOW. I decided to make my first card with one of my top favorites in this new collections – this sentiment stamp from the Antique Lantern PreCut Set.

Thanks for all you are 1

Thanks for all you are to me 2

HC Products: HCDP1 229 Countryside Evening Paper Collection, HCPC 3512 Antique Lantern PreCut Set, HCPC 3303 Posy Patch Flowers PreCut Set, HCPC 3494 Delicate Asters PreCut Set, HCD 701 Posy Patch Die, HCD 729 Decorative Blossom Corner Die, HCD 726 Delicate Asters Die. Other Products:Versa Fine Onyx Black ink, Black and yellow cardstock, Prima lace, rhinestones, button, scrappers floss and grosgrain ribbon. Glue and foam tape.

Instructions:Make card from cardstock. Trim Black cardstock 5.5 x 5.5 and diecut top left corner with Decorative Blossom Corner. Trim Patterned paper to fit the black piece and adhere. Stamp sentiment on patterned paper and cut as tag. Make a hole and ad ribbon and button with scrappers floss. Adhere to card with foam tape. Tuck some lace under the tag. Stamp and die cut Posy Patch flowers and adhere to card. Ad rhinestones to centers. Stamp and diecut leafs from Delicate Aster set/die and decorate card. Adhere panel to cardbase.

Thank you for coming by my place today. Don’t forget to stop by the Heartfelt Creations Blog and check out all the gorgeousness made by the Design Team. And remember – if you leave a comment there, you have a chance to win the whole collection!

Tesa

1/05/2013

Life

Happy Saturday!

I’m here to share a card for Skipping Stones Design. The Design Team challenge the last two months was to use our favorite sets. So I inked up Breathtaking Butterflies. It is sooooo beautiful! :)

Life 1

It ended up a true CAS card. I tried to decorate it, but whatever I did, it shadowed the butterfly and sentiment. So it ended up really clean. And I like it. :)

Life 2

Heather has the entire store on sale ala the infamous PMS sale or Purchase More Stamps!  The more you buy, the more you save!

  • Buy ONE set: Enter PMS1 for 5% off!
  • Buy TWO sets: Enter PMS2 for 10 % off!
  • Buy THREE sets: Enter PMS3 for 15% off!
  • Buy FOUR sets: Enter PMS4 for 20% off!
  • Buy FIVE sets: Enter PMS5 for 25% off!
  • Buy SIX or MORE sets: Enter PMS6 for 30% off!

All info can be found HERE.

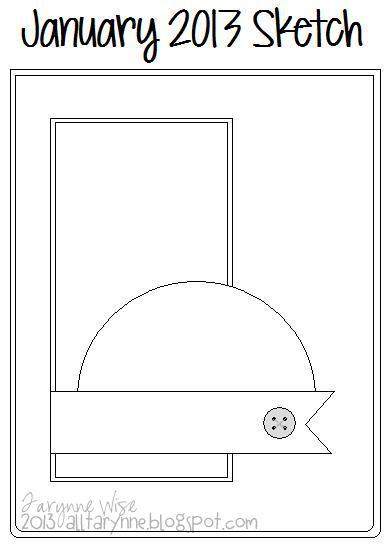
The card is based on this beautiful sketch by Tarynne Wise for Scrapbook.com Card Sketch Challenge.


Thanks for stopping by and have a fab Saturday!

Tesa

1/02/2013

Happy New Year!!! And a Gatefold Card

Hi all!!! A big Happy New Year to you!!! I was planning on making a post yesterday and taking a tour to my blogging friends, but I’ve been down with the flu and spent most of the day in bed or playing a game with the boy. Missed out on the celebration on New Years Eve but we had a really good dinner just the family instead and except for the flu, it was really nice. I had an excellent excuse to take a deep slurp of Laphroaig… :)

Over to my card – finally…

Life 1

It’s a gatefold card, using the Timeless Amour dies and stamps, Spellbinders Decorative Labels Eight. I love these pastel colors and subtle patterns of the paper from the Vintage Floret Paper Collection!

Life 4

Life 3

HC Products: HCDP1 227 Vintage Floret Paper Collection, HCPC 3509 Timeless Sentiments PreCut Set, HCPC 3303 Posy Patch Flowers PreCut Set, HCD 728 Timeless Amour Die, HCD 701 Posy Patch Die, Spellbinders Decorative Labels Eight. Other: Versa Fine – Onyx Black, Colorbox – Chestnut Roan. White cardstock and pearls. Basic Grey magnets.

Instructions: Make a gate fold card out of cardstock. Ink edges. Die cut two Decorative labels eight out of patterned paper. Use the die as stencil and cut out two panels of patterned paper to fit the die cuts. Ink edges. Split one in half and adhere to the front. Ink edges. Die cut Timeless amour die and ad white cardstock to the back of the heart part. Glue to the left side front. Ad a magnet part to the back of the left side Timeless amour die. Ad the second magnet to the inside of the card. Glue the second Decorative labels eight die to the inside of the card. Decorate the front with Posy patch flowers and pearls. Stamp sentiment to patterned paper, trim and ink edges. Adhere to front to card. Ad one posy patch flower to the inside of the card.

Thank you for coming by my place today. Don’t forget to stop by the Heartfelt Creations Blog and check out all the gorgeousness made by the Design Team.

Tesa